Designed by cabinetmakers for cabinetmakers
With these patents, hanging doors and installing drawer fronts for cabinets is now so easy, anybody can do it!
Drawer Front Installation Clamps
Say goodbye to the frustration of aligning drawer fronts. The CUPSOL Drawer Front Installation Clamps make it easy for anyone to achieve a perfect, professional finish. Designed by a South African entrepreneur and cabinetmaker, Frans Jooste, this simple but effective tool will save you a lot of time.
With the drawer slides and drawer box already installed, start by extending the drawer out. Place the ‘L’ clamp on the left and the ‘R’ clamp on the right side of the drawer box. (Fig 1)
Tighten the rear clamps to hold everything securely in place. (Fig 2)
Next, slide the drawer front into the clamps and adjust it so that it lines up perfectly with the surrounding drawer fronts. Once aligned, tighten the front clamps to lock the drawer front in position. (Fig 3)
Now, fasten the drawer front from the inside of the drawer box for a secure fit. It’s that simple! (Fig 4)
Advantages of the Drawer Front Installation Clamps
- Easy to use for perfect drawer front alignment
- Saves time and reduces frustration
- Ensures a professional finish on every project
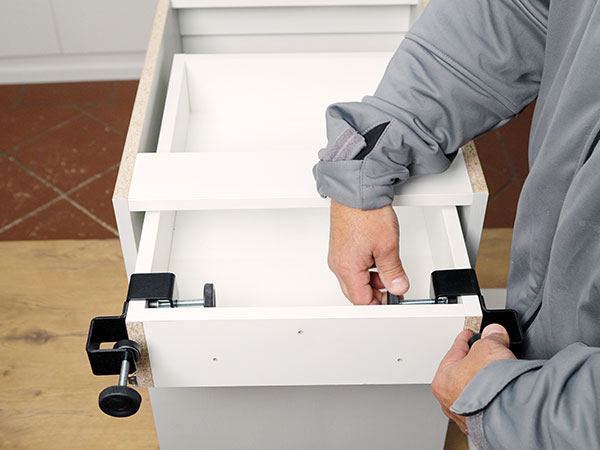
Figure 1

Figure 2
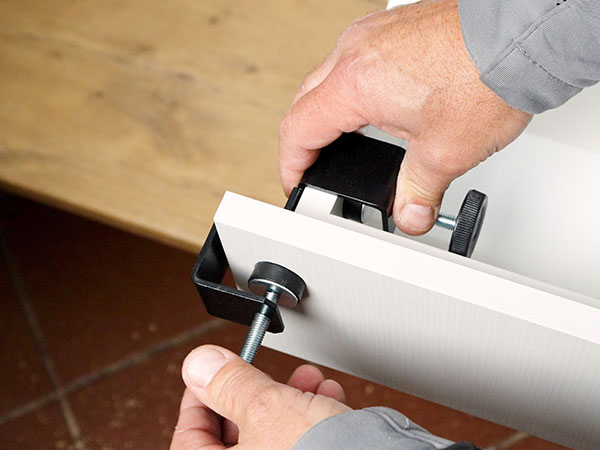
Figure 3
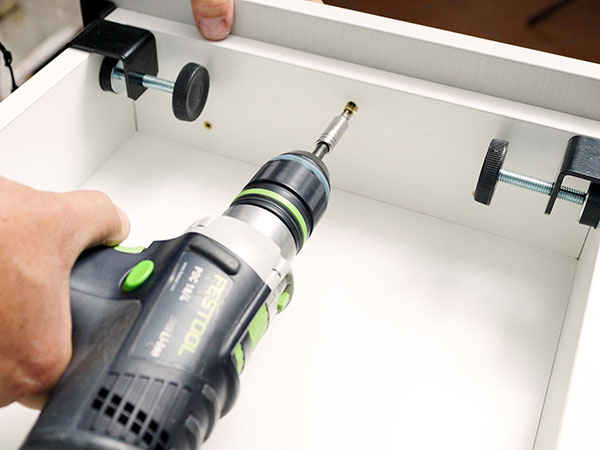
Figure 4
Inset Drawer Front Installation Clamps
Perfectly aligning inset drawer fronts just got easier. With the Inset Drawer Front Installation Clamps, you can achieve flawless, professional results every time.
Begin by extending the drawer box from the cabinet. Attach the clamps with the ‘L’ clamp on the left and the ‘R’ clamp on the right side, then tighten the rear clamps to hold them securely. (Fig 4)
Next, use the included Allen Key to loosen the screws on the top of each clamp. Adjust the clamps so that the side of each one touches the inside of the cabinet carcass. Tighten the screws back down for a snug fit. (Fig 5)
Now, slide the drawer front into the clamps, aligning it with adjacent drawer fronts. Once you’ve positioned it perfectly, clamp the front to hold it securely in place. (Fig 6)
Finally, fasten the drawer front from the inside of the drawer box. The clamps hold everything firmly, so you’ll have a precisely aligned front every time. (Fig 7)
Advantages of the Inset Drawer Front Installation Clamps
- Ensures flawless alignment for inset drawer fronts
- Adjustable side supports for precise fit
- Saves time and delivers professional results
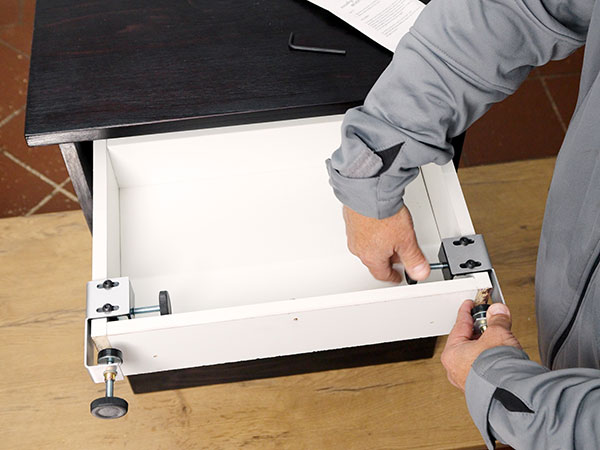
Figure 4
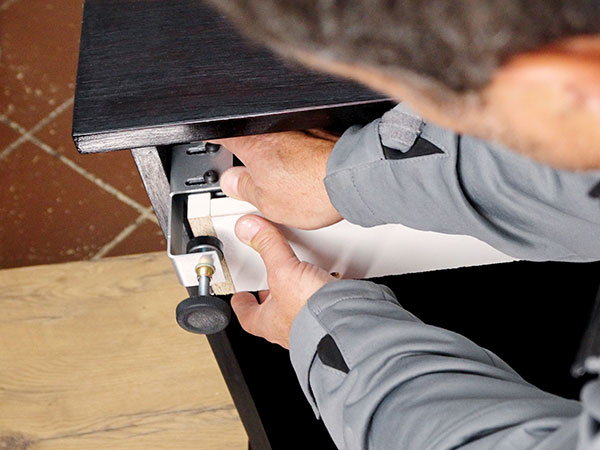
Figure 5
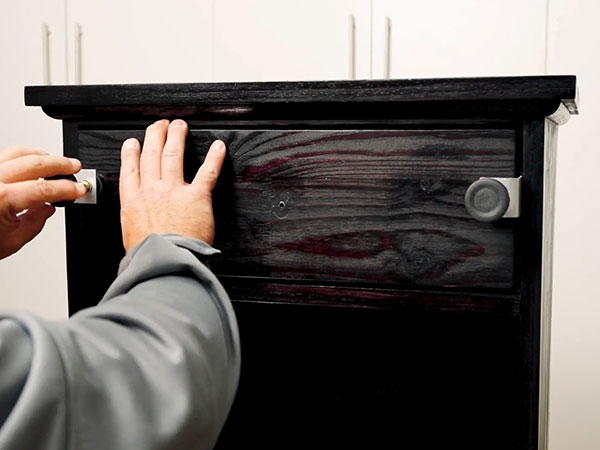
Figure 6
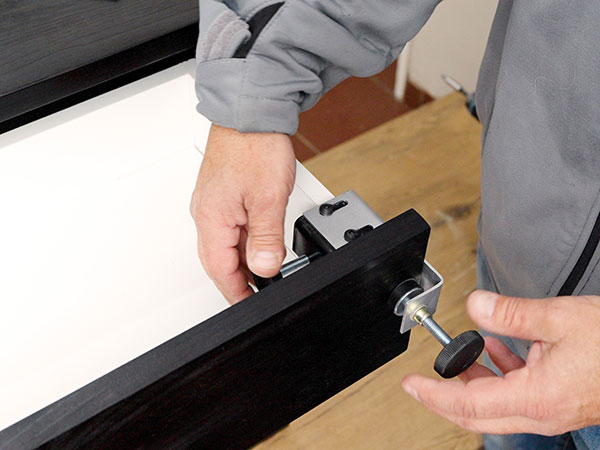
Figure 7
Euro Hinge Jig & Multi Tool
Meet the EURO Hinge Jig, your all-in-one solution for precise hinge installation and much more.
Before you start, ensure the cutting bit is securely fastened to the bearing assembly with no gaps for optimal performance.
Function 1:
Designed for versatility, the EURO Hinge Jig makes drilling concealed hinge holes a breeze. Align the ‘horns’ with the top and bottom of your doors, and tap the screw heads with a hammer to secure the jig in place—no clamps needed! (Fig 8)
Drill precise 35mm holes for concealed hinges with ease. Keep the drill upright and start with the bit’s centre point touching the wood. (Fig 9)
Function 2:
Perfectly position hinge base plates with 5mm holes. Place the jig’s contact point against the cupboard ceiling, then drill using the baseplate template. Mark the drill bit with tape to avoid drilling too deep. (Fig 10)
Fasten with Euro-style screws for a secure and professional finish. (Fig 11)
Function 3:
Install adjustable shelves effortlessly. Measure the shelf position, drill initial holes using centre markers, and then continue drilling along the marked line. (Fig 12)
Use a 5mm bit in one drilled hole to align the next, ensuring precision across all shelves. (Fig 13)
And here’s the game-changer: Drill hinge holes while the door is still on the cabinet! Replace the marking pins with longer screws, secure the jig, and drill. It’s that simple. (Fig 14)
Advantages of the EURO Hinge Jig & Multi-Tool
- Drills precise holes for hinges, base plates, and shelves
- No clamps needed, with built-in pins for stability
- Unique ability to drill hinge holes with the door on the cabinet

Figure 8

Figure 9

Figure 10

Figure 11

Figure 12

Figure 13

Figure 14
Hinge Repair Kit
Introducing the Hinge Repair Kit—the quick and easy solution for fixing damaged cabinet hinge holes. Worn-out or damaged hinge holes can make your cabinets unstable and doors misaligned. But with the Hinge Repair Kit, you can restore stability in minutes.
Simply peel off the adhesive backing, place the metal plate over the existing hinge, and align it with the original hinge location. (Fig 15)
Next, secure the plate and hinge using the screws provided. The metal plate reinforces the original hinge location, ensuring a secure and steady hinge. (Fig 16)
With the Hinge Repair Kit, your cabinet doors will function like new, with improved stability and alignment.
Advantages of the Hinge Repair Kit
- Quick and easy fix for damaged hinge holes
- Restores stability and alignment
- Affordable and practical solution
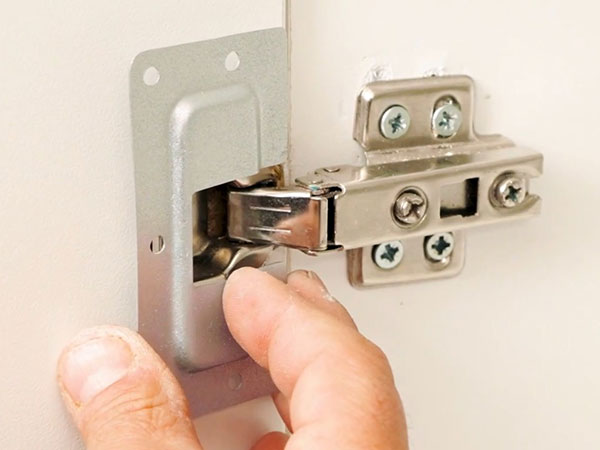
Figure 15
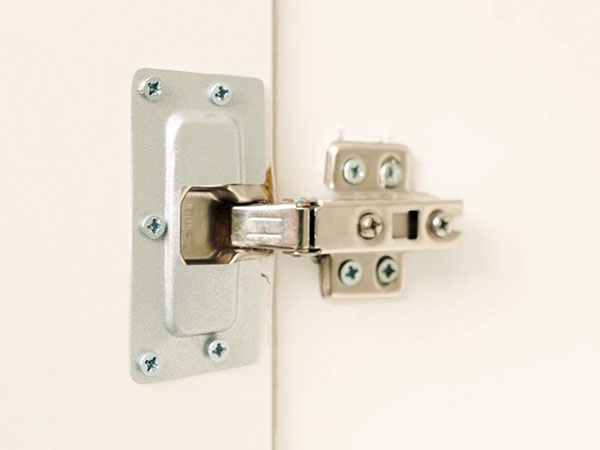
Figure 16
Cam & Dowel Jig
Introducing the CUPSOL Cam & Dowel Jig—your essential tool for precise, efficient woodworking.
Start by setting the correct drill bit depths using the provided stops to ensure accurate and consistent results. With the CUPSOL Jig, installing Cam & Dowel inserts is a straightforward process. Align the jig for perfect 50mm spacing, ensuring both parts fit seamlessly.
First, clamp the jig securely onto your workpiece. (Fig 17)
Use a 15mm drill bit to create the first hole. (Fig 18)
Switch to an 8mm drill bit for the second hole. (Fig 19) Finally, use a 5mm drill bit for the third hole, (Fig 20) ensuring alignment with the side panel of your cabinet. With these steps, your parts are ready for assembly. (Fig 21)
Need to switch tasks? Easily swap the 5mm and 8mm guides. The jig’s spring-loaded guides allow for fine adjustments, providing flexibility and precision. (Fig 22)
For dowel installation, adjust the stops on the 8mm drill bits to control the depth. Clamp the jig, drill with the preset 8mm bit, (Fig 23) then repeat on the other piece. The two pieces can now be glued together.
Advantages of the Cam & Dowel Jig
- Simplifies cam and dowel installation with precise alignment
- Adjustable stops and spring-loaded guides for flexibility
- Saves time and ensures accurate results
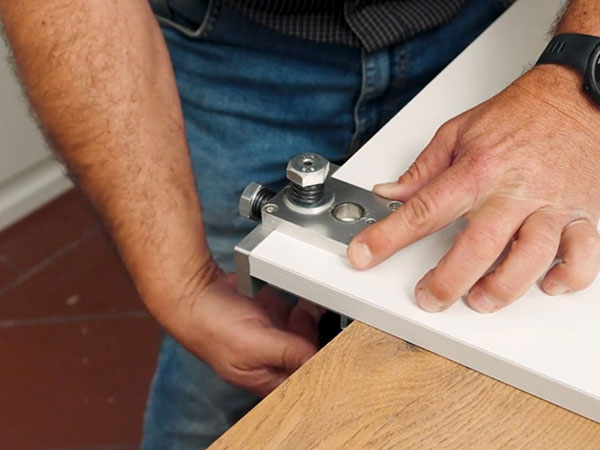
Figure 17
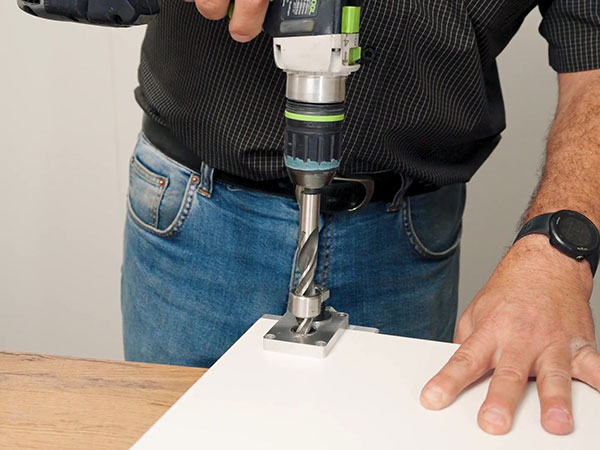
Figure 18
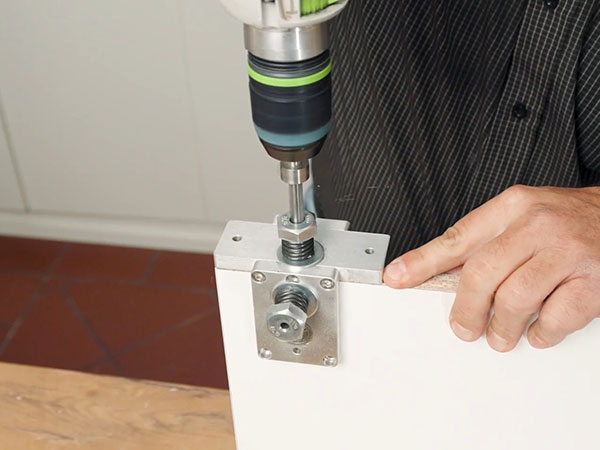
Figure 19
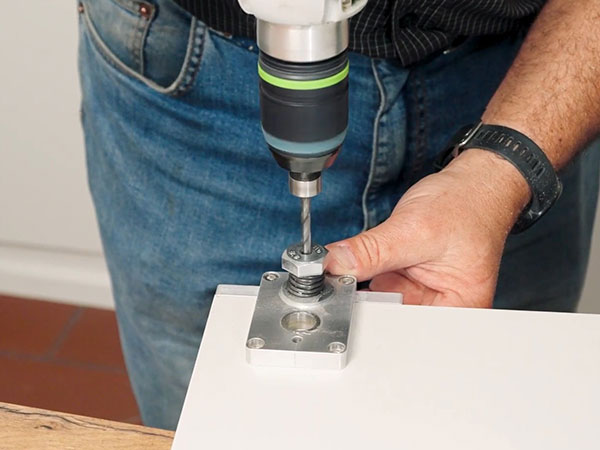
Figure 20
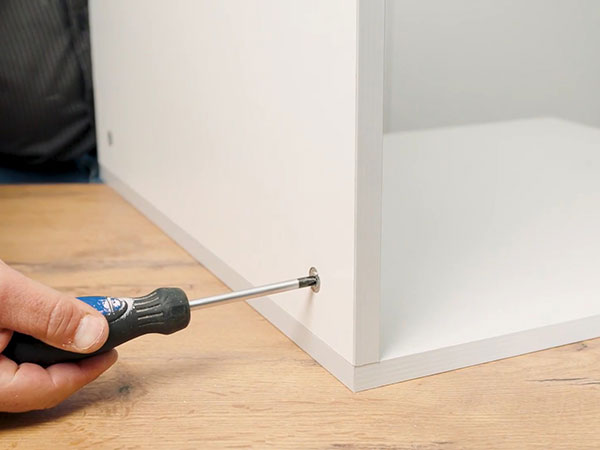
Figure 21
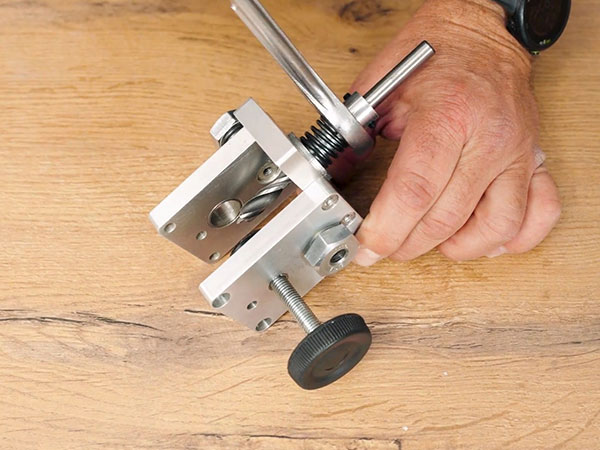
Figure 22
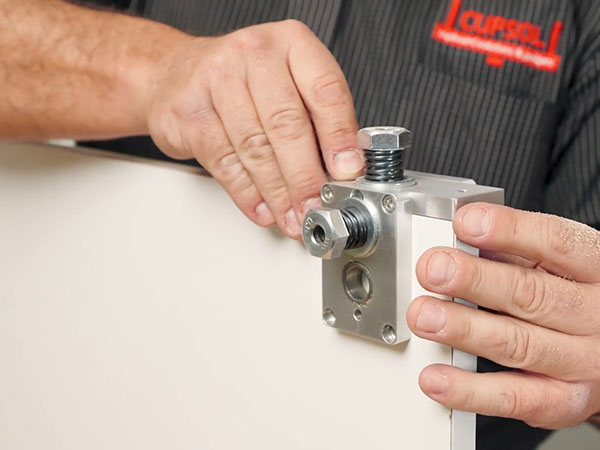
Figure 23
